
In this article, we are going to show you how to clean a Black and Decker blender with easy to follow steps and pictures included. If you love eating smooties, juices and/or purees, you will notmally use your blender a lot.

It is very important to do at least a light or fast clean to your blender after each use. Cleaning a blender is not the same as scrubbing a pot, pan or coffee pot and tossing it to the dishwasher.
A deep clean of your blender is necessary once a week, for this you have to take apart the jar assembly to get access to clean the base, gasket and blade. This deep cleaning prevents basteria growth from food residie that gets stuck at the bottom of the jar, which is difficult to access without dissambling the jar.
Read on to learn the best way to clean a blender, including how to disassemble the jar.
How to Clean a Black and Decker Blender – Fast Method
After every use it is recommended to at least do this quick 30-second blender cleaning hack:
- Rinse out the blender jar
- Fill it less than halfway with warm water
- Add just a drop of dish soap
- Run the blender (with the lid on) for a few seconds on a low setting
- Dump the dirty water and rinse the jar
How to Clean a Black and Decker Blender – Deep Clean Method
This method of deep cleaning is recommended to be done at least once a week if you use your blender daily or once a month if you use your blender once or twice a week.
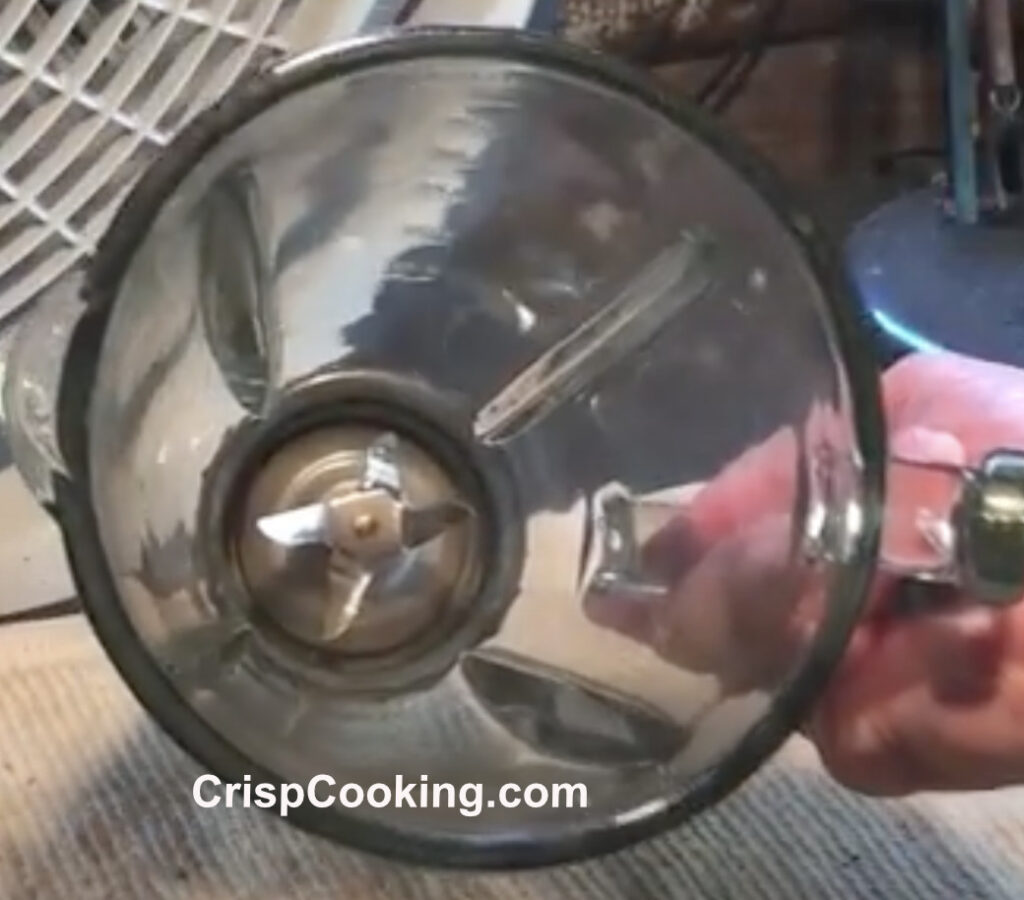
You can see in the following picture, the bottom part surrounding the blade, is pretty dirty. It is very difficult to reach down there and clean without risking to cut yourself with the blade. This is why it is better the take the jar assembly apart.
Tools Needed
- Tongue and Groove pliers
- Socket wrench
- Dish Soap
- Gloves
- Large Soaking Bowl
Step 1
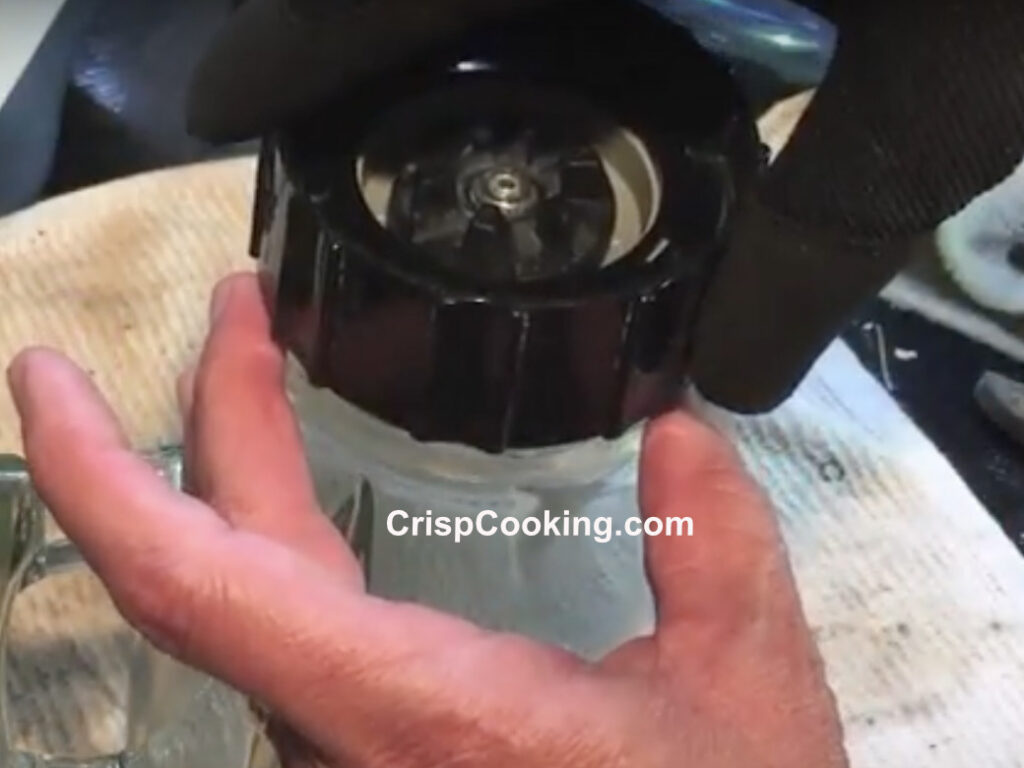
With the tongue and groove pliers (pictured below), grab the bottom black part and twist it counter clockwise. Once it loosens with the pliers, you can finish removing it by hand.
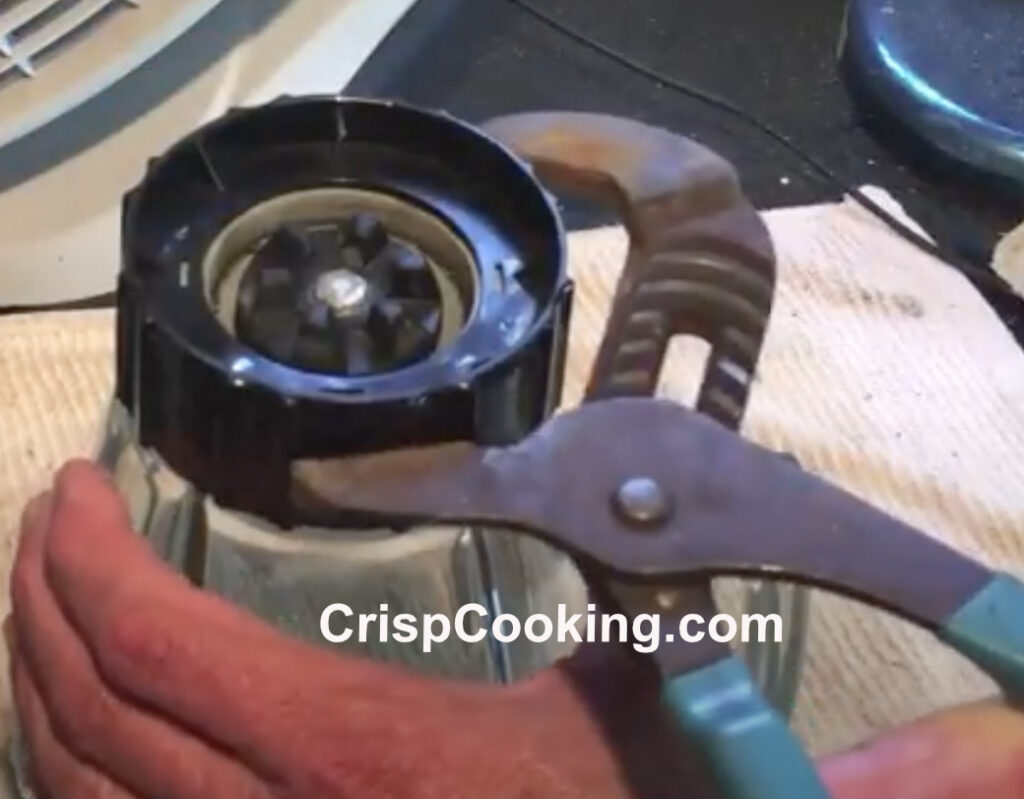
In the picture below you can see the rubber gasket. It is dirty too.

Step 2
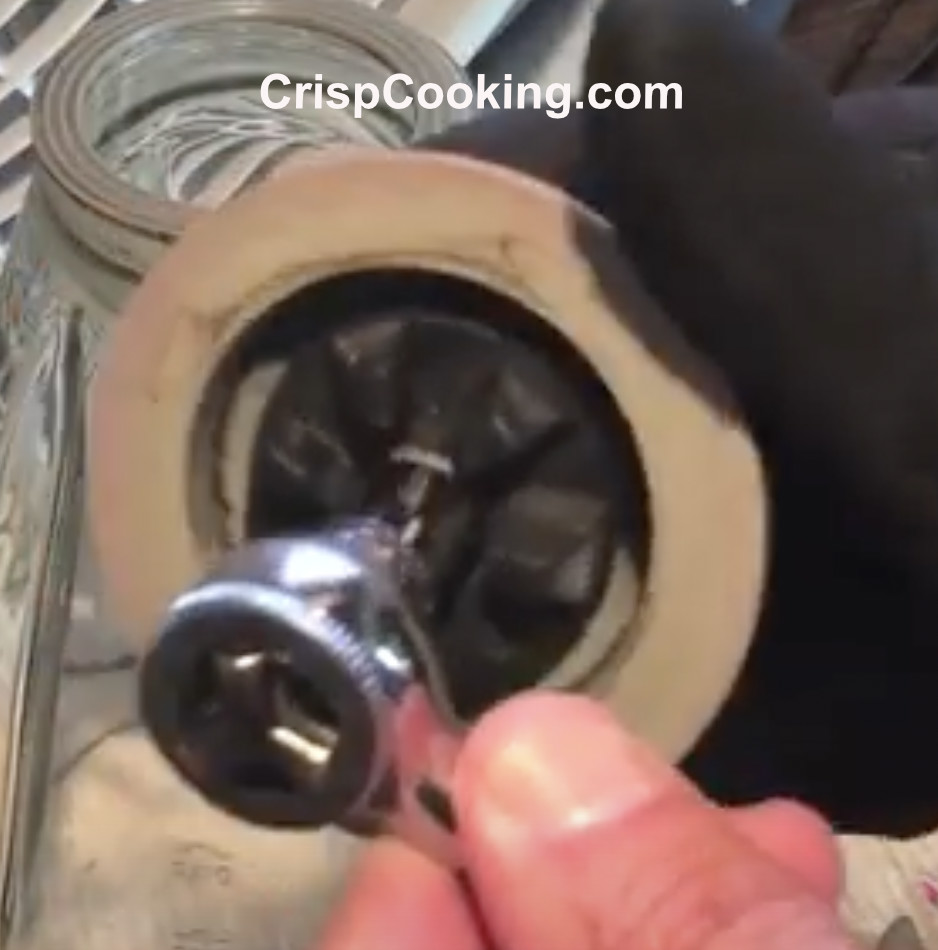
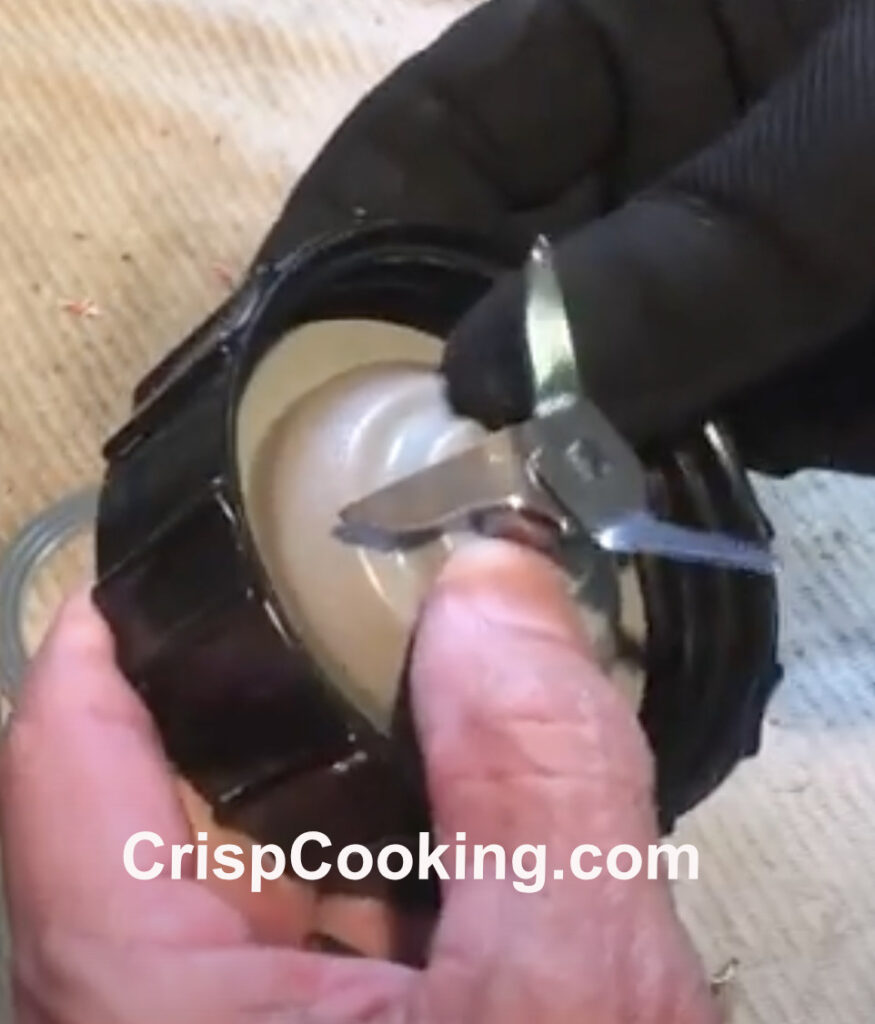
This particular Black and Decker blender has a 3/8″ nut to remove. Use a glove on one hand to avoid being cut with the blade. Grab the blade with gloved hand. With the socket wrench over the nut (pictured below), start twisting clockwise until you remove the nut.
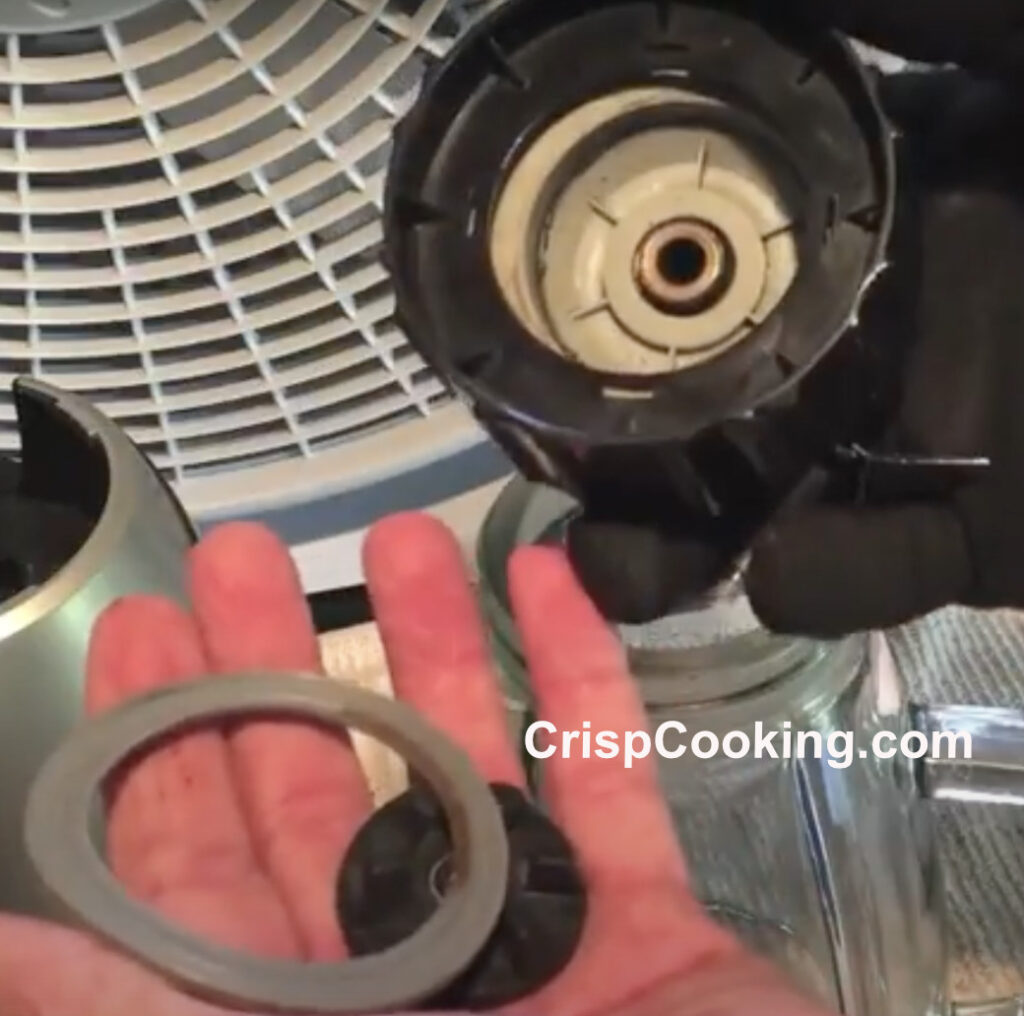
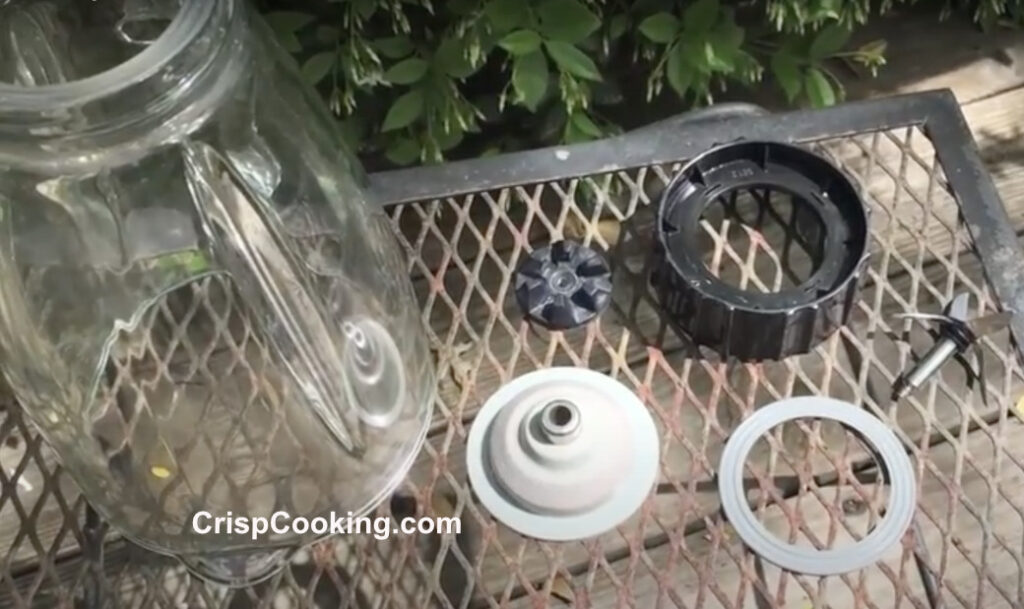
Once you remove the nut, the blade comes off. Now you have all parts disassembled. (picture below)
Step 3
Grab the large soak bowl and add some hot water and some dish soap. Toss the disassembled Jar parts into the bowl. (pictured below)

Also place the bottom part of the jar in the bowl. (pictured below)

Step 4
Scrub all the parts with a non-abrasive sponge to remove any hard grease or food particles stuck. Then let them air dry. (picture below)
Step 5
Reassemble the bottom jar parts. (picture below)
Turn the jar upside down and place the rubber gasket. (picture below).

Place back the assembled black bottom. (picture below). Use the Pliers to tighten it.
That completes the deep cleaning process. Now you should connect the blender and try it and see if it is working properly.
Tips and Tricks
To properly maintain Black and Decker blenders keep the following best practices in mind:
- Always unplug the blender before cleaning and after using it.
- Never soak the Black and Decker blender motor base in water or any liquid.
- Handle Black and Decker blender blade assemblies with care when attaching, detaching, or washing to avoid accidents.
- Clean the base of your Black and Decker blender with a damp cloth.
- Store the Black and Decker blender in its upright position.
FAQs on How to Clean a Blender
How do I get rid of stains in my Black and Decker blender?
To clean a Black and Decker blender that has tough stains, you can use a mixture of hot water, white vinegar and baking soda. Let the mixture sit in the blender for a couple of hours and then clean it as stated in this guide.
How often should you clean your Black and Decker blender?
It is highly recommender to clean your Black adn Decker blender after each use and deep clean it at least once a month.
How do I store my Black and Decker blender properly?
You should store your Black and Decker in the upright position with no objects on top of the lid. The power cord should be stored on the cord storage area if it has one, or behind the motor base.
Can I clean my Black and Decker blender in the dishwasher?
You can clean the jar in the dishwasher but it is not recommended. The dishwasher can easily be etche or scratch the jar even if it made of glass. It is safer to wash the jar by hand.
Final Thoughts
In the long run, it is best if you wash your Black and Decker blender after each use. This will ensure your blender work at its optimal performance.
The deep clean method shown in this guide is recommended to be done at least once a month. If you do it more frequently is even better. The food stuck in the nooks and crannies at the bottom of the jar can change the flavor and taste of your juices and smoothies. Nobody wants this.
If you blender is not from Black and Decker, please follow our specific guide for the following brands:
Happy blending!

Hello, I am Cristy. I love cooking but what I love most is keeping my kitchen tools and appliances top notch. I enjoy writing about everything I have learned around the kitchen. I believe that keeping your kitchen tools well cleaned and maintained produces the best dishes and drinks. Besides writing and cooking I enjoy traveling, camping, hiking and music.